TP-Link VR300 Installation Guide
TP-Link Archer VR300 Box content
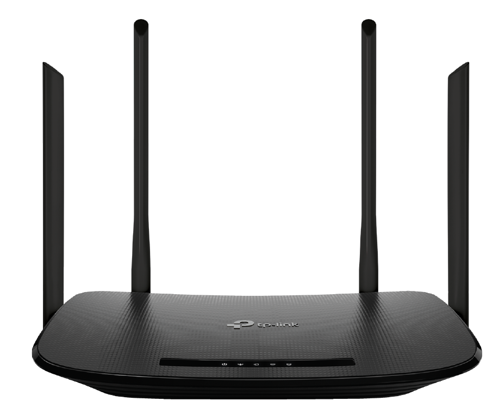
Check the Model of the modem router first. V1.2 model has 5 LEDs on the top of the modem, V2 has only 1 LED on the top of the modem.
The TP-Link VR300 box should contain:
- A modem, with 4 antennas
- A PSU (Power Adapter) with the correct socket
- 1 or 2 x RJ11 <-> wall socket cable, to connect the modem to the DSL port
- An RJ45 Ethernet cable, suitable for FastEthernet connections
TP-Link VR300 Physical installation
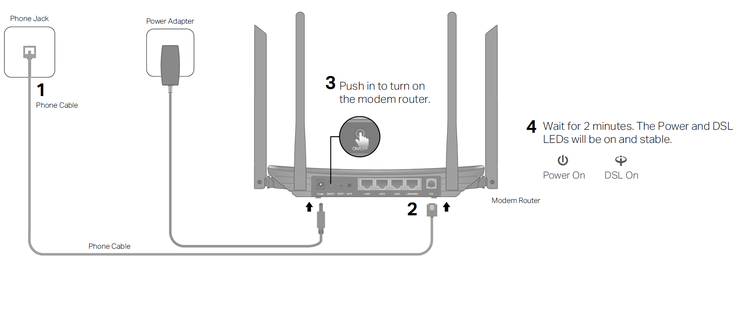
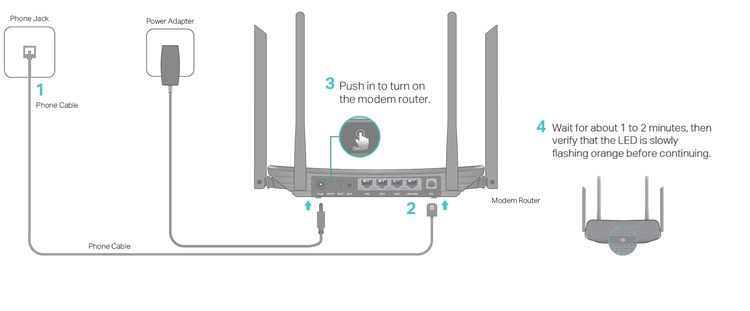
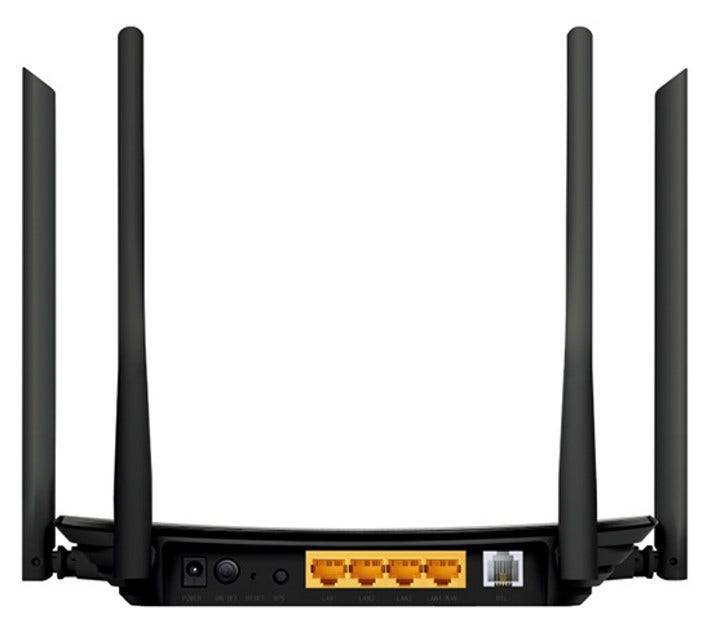
- Connect the TP-Link VR300 modem router VDSL2 WAN port (2) to a wall socket (1), use provided country kit adapter, if necessary
- Connect your computer to the TP-Link VR300 modem router’s LAN port (4-port yellow LAN switch ) via an Ethernet cable
- Plug the power adapter to the power outlet and connect other end of the cable to the Power port of the TP-Link VR300 modem router
- Power on your TP-Link VR300 modem router (3)
- Configure your network with the Technical details provided in Order Completion e-mail
Notes:
- The antennas are solidly attached, cannot be removed.
- The splitter installation is optional. The Phone cable can be directly inserted into the light grey socket modem (2) and the wall socket (1), eventually using a country specific telecom converter plug.
- Wait 1-2 minutes for the Power and DSL LED to be On and Stable (V1.2) or for LED flashing Orange (V2)
TP-Link VR300 V1.2
TP-Link VR300 V2
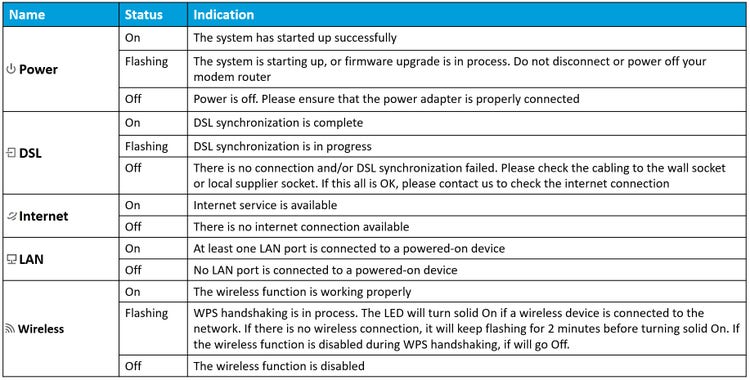
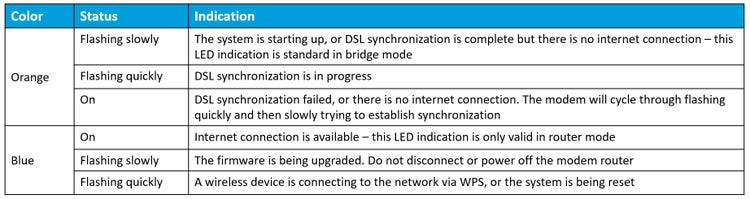
LED indications:
On top of the modem, there is 1 LED (V2) or 5 LEDs (V1.2) present. Below table shows LED light indication.
TP-Link V300 V1.2:
TP-Link V300 V2:
Button Legend
The modem router’s back panel shows the ports, buttons and antennas. Refer to the below table for legend.

Related content
- Get Prisma VPN Tunnel setup requirements
- TP-Link VR600 Installation Guide
- SmartRG SR506N Installation Guide
- How to Make Changes to AT&T Virtual Private Network Port Speeds
- How to Make Changes to AVPN Port Level Class of Service
- Customer expectation document for AT&T Virtual Private Network
- International contact list: AT&T Virtual Private Network
- How to run VoIP reports using Access Network performance Reporter in AT&T Business Center
- Learn about AT&T Virtual Private Network Service Orders
- AT&T VPN Service Customer Not Ready Policy
- AT&T VPN Delivery and Installation: LAN Migration and Post Install Support
- AT&T VPN Delivery and Installation: Day of Installation
- AT&T VPN Delivery and Installation: Prepare for Installation
- AT&T VPN Delivery and Installation: Access Delivery
- AT&T VPN Delivery and Installation: Equipment Delivery
- AT&T VPN Delivery and Installation: Welcome